


Résumer cet article :
The last heatwave was tough for many households. Too hot nights, houses that no longer cool down, fans that circulate warm air, and that unpleasant feeling that the walls themselves turn into radiators. And bad news: weather models are already signaling a possible return of high temperatures in early July, although forecasters remain cautious about the exact intensity and duration of the episode.
So no, home automation will not turn a poorly insulated house into an alpine chalet. It will not replace a real air conditioning system when the house exceeds 30°C day and night. But it can make a big difference in one specific area: acting at the right moment.
During a heatwave, everything is a question of timing. Closing the shutters too late lets in several hours of sunlight. Opening the windows too early in the evening brings in even warmer air. Letting an air conditioner run without logic will explode the bill. Home Assistant precisely allows you to orchestrate all of this automatically.
And the best part is that you can start simply, with a few sensors under €15, local weather, and some easy-to-copy automations.
The basic principle: preventing heat from entering before trying to get it out
The first reflex in the event of a heatwave is not to turn on a fan. It is to close the house at the right time. A house should function like a cooler: it keeps the coolness accumulated during the night, then blocks as much heat as possible during the day.
In a non-connected house, this requires walking around the rooms several times a day. Shutters to the east in the morning, shutters to the south at noon, shutters to the west in the afternoon, windows to be closed as soon as the outside air becomes warmer than the inside… On paper, it’s simple. In real life, we forget, we’re at work, the kids open a window, or we think, “It will be fine like this.” Spoiler: no, it will not be fine like this.
With Home Assistant, we can automate this logic. The house compares temperatures, monitors the sun, takes into account the presence of occupants, then acts or sends a notification. It doesn’t think for you; it just saves you from having to think about it all day long. During a heatwave, that’s already a luxury.
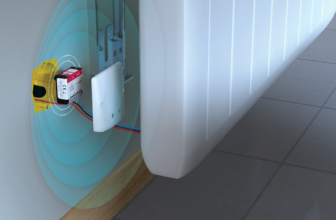
The necessary equipment to get started
To set up a real anti-heatwave strategy in Home Assistant, there’s no need to transform the entire house. You can start with a very simple setup.
The minimum requirement is an indoor temperature sensor. This can be a Zigbee Aqara, Sonoff, Tuya, Ikea, Frient sensor, a connected thermostat, a Netatmo module, or even a sensor already present in a thermostatic valve. Ideally, one should be placed in the living room and another in the bedrooms.
Next, you’ll need an outdoor temperature. The easiest way is to use the weather integration already available in Home Assistant, or an integration like OpenWeatherMap. This is sufficient to start, but it is not perfect: the temperature retrieved comes from a nearby weather station, not necessarily from your garden. The best option remains a real outdoor sensor placed in the shade, on the north side, under shelter.
Then come the actuators. Connected roller shutters via Shelly, Fibaro, Somfy, Zigbee, Z-Wave, Matter, or others. Motorized awnings. Air conditioning controllable by infrared via Sensibo, Tado, Broadlink, SwitchBot Hub, Netatmo Control, or a universal remote compatible with Home Assistant. And why not a few connected plugs to control fans.
Finally, an opening sensor on windows is a real plus. It helps to know if a window is already open, avoids unnecessary notifications, and above all, detects an inconsistency: for example, an open window while the outside air is scorching.
Step 1: create the right sensors in Home Assistant
Before creating automations, Home Assistant needs to have accurate information. This is crucial. Home automation without sensors is like a conductor without musicians.
Start by identifying your entities. In Home Assistant, go to Settings, then Devices and Services, then Entities. Look for your indoor temperature sensor. You will get a name of the type:
sensor.temperature_salonNext, look for the outdoor temperature. It can come from a local weather station:
sensor.temperature_exterieureOr from the weather integration:
weather.maisonIn this last case, Home Assistant does not always provide a direct temperature entity. Therefore, you can create a template sensor in the configuration.yaml file, or through the interface if you are using template assistants.
Here is a simple example to add to configuration.yaml :
template:
  - sensor:
      - name: "Outdoor Temperature Weather"
        unique_id: temperature_exterieure_meteo
        unit_of_measurement: "°C"
        state: "{{ state_attr('weather.maison', 'temperature') }}"
After restarting Home Assistant, you will have a new entity:
sensor.temperature_exterieure_meteoThis will be usable in automations.
Step 2: create a “heatwave mode” sensor
Rather than placing conditions everywhere, we will create a virtual sensor that indicates whether the house is in a high heat situation. This is much easier for a beginner to read.
In configuration.yaml, add this:
template:
  - binary_sensor:
      - name: "Heatwave Mode"
        unique_id: mode_canicule
        state: >
          {{ states('sensor.temperature_exterieure_meteo') | float(0) >= 30
             or states('sensor.temperature_salon') | float(0) >= 26 }}
This sensor turns to on if the outdoor temperature exceeds 30°C or if the living room reaches 26°C. You can adjust the thresholds. In a very well-insulated house, 25°C inside may already be your alert threshold. In an old stone house, 27°C may sometimes be more realistic.
This sensor will then be usable everywhere. For example: “if heatwave mode is activated, close the shutters exposed to the sun”.
Step 3: automate evening free cooling
“Free cooling” is the use of the cool outside air to naturally cool the house. The idea is as old as the world: you close everything when it is warmer outside than inside, then you open everything as soon as the outside becomes cooler.
Home Assistant can monitor this precise moment. No need to check the weather app every ten minutes.
Here is a simple automation that sends a notification as soon as it is time to open the windows:
alias: Heatwave - open windows for free cooling
description: Notify when outside air becomes cooler than inside
mode: single

trigger:
  - platform: numeric_state
    entity_id: sensor.temperature_exterieure_meteo
    below: sensor.temperature_salon

condition:
  - condition: numeric_state
    entity_id: sensor.temperature_salon
    above: 24
  - condition: time
    after: "19:00:00"
    before: "02:00:00"

action:
  - service: notify.mobile_app_votre_telephone
    data:
      title: "Free cooling possible"
      message: >
        It is now cooler outside than inside.
        Open the windows to cool down the house.
You’ll need to replace notify.mobile_app_votre_telephone with your own notification service. To find it, go to Developer Tools, then Services, and type notify.mobile_app.
This automation is intentionally simple. It monitors when the outdoor temperature falls below that of the living room. It also checks that it is still over 24°C in the living room, to avoid unnecessary alerts. And it only works in the evening or at night.
For a more comfortable version, we can add a minimum gap. If the outside is only 0.2°C cooler, opening all the windows isn’t very useful. Here’s a more intelligent version.
alias: Heatwave - effective free cooling notification
description: Notify only if the outside is at least 1.5°C cooler
mode: single

trigger:
  - platform: time_pattern
    minutes: "/10"

condition:
  - condition: time
    after: "19:00:00"
    before: "02:00:00"
  - condition: template
    value_template: >
      {{ states('sensor.temperature_salon') | float(0) >= 24 }}
  - condition: template
    value_template: >
      {{ (states('sensor.temperature_salon') | float(0) -
          states('sensor.temperature_exterieure_meteo') | float(0)) >= 1.5 }}

action:
  - service: notify.mobile_app_votre_telephone
    data:
      title: "Open the windows"
      message: >
        It is {{ states('sensor.temperature_exterieure_meteo') }}°C outside
        compared to {{ states('sensor.temperature_salon') }}°C in the living room.
        This is the right time to cool the house.
The automation checks the situation every ten minutes and only alerts if the outside is at least 1.5°C cooler than the inside. This is much more relevant.

Step 4: notify when it’s time to close everything in the morning
Free cooling is great. But it has a trap: forgetting to close the windows in the morning. And there, all the coolness gained during the night can vanish within an hour.
So we are going to create the opposite automation. As soon as the outside air becomes warmer than the inside, Home Assistant alerts that it needs to close.
alias: Heatwave - close windows in the morning
description: Notify when outside air becomes warmer than inside
mode: single

trigger:
  - platform: time_pattern
    minutes: "/10"

condition:
  - condition: time
    after: "06:00:00"
    before: "12:00:00"
  - condition: template
    value_template: >
      {{ (states('sensor.temperature_exterieure_meteo') | float(0) -
          states('sensor.temperature_salon') | float(0)) >= 0.5 }}
  - condition: state
    entity_id: binary_sensor.mode_canicule
    state: "on"

action:
  - service: notify.mobile_app_votre_telephone
    data:
      title: "Close the windows"
      message: >
        The outside air is becoming warmer than inside.
        Close the windows and shutters to keep the coolness.
Here, we accept a gap of only 0.5°C. In the morning, it’s better to close a bit too early than too late: heat rises quickly, especially on sun-exposed façades.
Step 5: automatically close shutters according to the sun’s orientation
This is probably the most useful automation during a heatwave. The shutters should not necessarily stay closed all day; otherwise, the house becomes a cave, and nobody wants to live in a bunker in the middle of July.
The good approach is to close the shutters only when a façade is exposed to the sun: east shutters in the morning, south shutters at midday, west shutters in the afternoon. This way, we maintain maximum light without letting the sun beam on the glass.
In Home Assistant, the entity sun.sun provides two very useful pieces of information: the elevation of the sun and its azimuth. The azimuth indicates the direction of the sun. To simplify, east is around 90°, south around 180°, and west around 270°.
Here is an example to close the south shutters when the sun is shining on them and it’s hot:
alias: Heatwave - close south shutters
description: Close the south shutters when the sun heats the façade
mode: single

trigger:
  - platform: time_pattern
    minutes: "/10"

condition:
  - condition: state
    entity_id: binary_sensor.mode_canicule
    state: "on"
  - condition: numeric_state
    entity_id: sun.sun
    attribute: elevation
    above: 20
  - condition: template
    value_template: >
      {{ 140 <= state_attr('sun.sun', 'azimuth') | float(0) <= 220 }}

action:
  - service: cover.close_cover
    target:
      entity_id:
        - cover.volet_salon_sud
        - cover.volet_cuisine_sud
For the east shutters:
alias: Heatwave - close east shutters
description: Close the east shutters in the morning during heat
mode: single

trigger:
  - platform: time_pattern
    minutes: "/10"

condition:
  - condition: state
    entity_id: binary_sensor.mode_canicule
    state: "on"
  - condition: numeric_state
    entity_id: sun.sun
    attribute: elevation
    above: 10
  - condition: template
    value_template: >
      {{ 60 <= state_attr('sun.sun', 'azimuth') | float(0) <= 130 }}

action:
  - service: cover.close_cover
    target:
      entity_id:
        - cover.volet_chambre_est
        - cover.volet_bureau_est
And for the west shutters:
alias: Heatwave - close west shutters
description: Close the west shutters in the afternoon during heat
mode: single

trigger:
  - platform: time_pattern
    minutes: "/10"

condition:
  - condition: state
    entity_id: binary_sensor.mode_canicule
    state: "on"
  - condition: numeric_state
    entity_id: sun.sun
    attribute: elevation
    above: 10
  - condition: template
    value_template: >
      {{ 230 <= state_attr('sun.sun', 'azimuth') | float(0) <= 310 }}

action:
  - service: cover.close_cover
    target:
      entity_id:
        - cover.volet_chambre_ouest
        - cover.volet_baie_ouest
Again, replace the names of the shutters with your own entities. To find them, go to Settings, Devices and Services, Entities, and then search for “shutter” or “cover”.
Small tip: if your roller shutters allow an intermediate position, it is often better to close them at 70 or 80% rather than completely. This way, you block a good part of the radiation while keeping some light.
action:
  - service: cover.set_cover_position
    target:
      entity_id: cover.volet_salon_sud
    data:
      position: 20
Be careful, depending on the integrations, position: 20 can mean “open at 20%” or “closed at 20%”. Test on a single shutter before applying it to the entire house. The devil is in the details, especially when it’s 38°C outside.
Step 6: automatically reopen shutters when the façade is no longer exposed
Closing the shutters is good. But if they stay closed all day, visual comfort suffers. We can plan the opposite automation: reopening a shutter when the sun is no longer on its façade, provided that the outdoor temperature is not outrageous.
Example for the east shutters:
alias: Heatwave - reopen east shutters after exposure
description: Reopen the east shutters when the sun is no longer shining on them
mode: single

trigger:
  - platform: time_pattern
    minutes: "/15"

condition:
  - condition: state
    entity_id: binary_sensor.mode_canicule
    state: "on"
  - condition: template
    value_template: >
      {{ state_attr('sun.sun', 'azimuth') | float(0) > 140 }}
  - condition: numeric_state
    entity_id: sensor.temperature_exterieure_meteo
    below: 34

action:
  - service: cover.set_cover_position
    target:
      entity_id:
        - cover.volet_chambre_est
        - cover.volet_bureau_est
    data:
      position: 60
The idea is not to fully open when it’s still very hot. You can simply raise the shutters a bit to let in some light without turning the room into an oven.
Step 7: connect a conventional air conditioning unit to Home Assistant
Many households have a mobile air conditioner or a wall split unit that operates with an infrared remote control. Good news: there’s no need to replace the unit with a connected model.
An infrared box like Sensibo, Tado Smart AC Control, Broadlink RM4 Mini, SwitchBot Hub, or some Tuya hubs can learn the commands from the remote control. Once integrated into Home Assistant, the air conditioning unit becomes controllable like a thermostat.
The simplest approach is to create a rule that turns on the air conditioning only if three conditions are met: it is too hot, someone is present, and the windows are closed.
Here is an example:
alias: Heatwave - smart air conditioning living room
description: Turn on the air conditioning only if necessary
mode: single

trigger:
  - platform: numeric_state
    entity_id: sensor.temperature_salon
    above: 27

condition:
  - condition: state
    entity_id: person.cedric
    state: "home"
  - condition: state
    entity_id: binary_sensor.fenetre_salon
    state: "off"
  - condition: time
    after: "10:00:00"
    before: "22:30:00"

action:
  - service: climate.set_temperature
    target:
      entity_id: climate.clim_salon
    data:
      temperature: 25
      hvac_mode: cool
This automation avoids turning on the air conditioning if the window is open. It also prevents cooling an empty house and sets a reasonable temperature to 25°C. During a heatwave, trying to maintain 21°C is rarely a good idea: consumption rises quickly, the compressor suffers, and the thermal shock is not pleasant.
We can also plan for automatic shutdown:
alias: Heatwave - stop living room air conditioning
description: Stop the air conditioning if the temperature is correct or the window is open
mode: single

trigger:
  - platform: numeric_state
    entity_id: sensor.temperature_salon
    below: 25.5
  - platform: state
    entity_id: binary_sensor.fenetre_salon
    to: "on"

action:
  - service: climate.turn_off
    target:
      entity_id: climate.clim_salon
This logic is very effective with a mobile air conditioner: it cools at the right moment, without letting the device run unnecessarily.
Step 8: control fans intelligently
A fan does not actually lower the temperature of a room. It improves the feeling by promoting the evaporation of sweat. However, if it’s running in an empty room, it’s practically useless, except for consuming electricity and sometimes adding a bit of heat via its motor.
With a connected plug, you can already do a lot. For example, turn on a fan in a bedroom only if the temperature exceeds 26°C, if someone is present, and if the night begins.
alias: Heatwave - bedroom fan at night
description: Activate bedroom fan during hot nights
mode: single

trigger:
  - platform: numeric_state
    entity_id: sensor.temperature_chambre
    above: 26

condition:
  - condition: time
    after: "21:30:00"
    before: "07:00:00"
  - condition: state
    entity_id: binary_sensor.presence_chambre
    state: "on"

action:
  - service: switch.turn_on
    target:
      entity_id: switch.prise_ventilateur_chambre
And for stopping:
alias: Heatwave - stop bedroom fan
description: Cut the fan if the bedroom cools down or becomes empty
mode: single

trigger:
  - platform: numeric_state
    entity_id: sensor.temperature_chambre
    below: 25
  - platform: state
    entity_id: binary_sensor.presence_chambre
    to: "off"
    for: "00:20:00"

action:
  - service: switch.turn_off
    target:
      entity_id: switch.prise_ventilateur_chambre
If you have a connected fan that supports oscillation or speed, like the Dreo we tested, you can go further: low speed at night, higher speed before bedtime, automatic shutdown in the early morning. Simple, but it changes everything regarding comfort.
Step 9: monitor sensitive rooms
Not all rooms heat up the same way. An attic bedroom can become unlivable at 6 PM while the living room remains acceptable. A west-facing bay window can quickly raise the temperature. A baby’s room, a room where an elderly person sleeps, or an office with a computer deserves special attention.
Therefore, we can create targeted alerts.
alias: Heatwave - alert too hot bedroom
description: Alert if a bedroom exceeds a critical threshold
mode: single

trigger:
  - platform: numeric_state
    entity_id: sensor.temperature_chambre
    above: 29
    for: "00:15:00"

action:
  - service: notify.mobile_app_votre_telephone
    data:
      title: "Bedroom too hot"
      message: >
        The bedroom has been at {{ states('sensor.temperature_chambre') }}°C for 15 minutes.
        Remember to close the shutters, move the bedding, or turn on a cooling system.
The 15-minute delay avoids false alerts due to a single measurement. It’s cleaner, more reliable, and less annoying.
Step 10: create a special heatwave dashboard
Once the sensors are in place, it’s useful to visualize what is happening. In Home Assistant, create a “Heatwave” dashboard with important temperatures: living room, bedrooms, outdoor shade, outdoor sun, humidity, status of shutters, status of windows, air conditioning, fans.

Most useful is displaying the curves over 24 hours. You can immediately see if the house has succeeded in cooling down during the night, if a room is accumulating heat, or if a façade is problematic. With two outdoor sensors, one in the shade and one in the sun, the difference can be spectacular. You finally understand why a south-facing window can ruin all the morning’s efforts.
To create this dashboard, go to Overview, click on the three points in the top right corner, then Edit the dashboard. Add a History or Graph card, then select your temperature sensors.
You can also add an Entities card with the shutters and windows. The goal: at a glance, know if the house is in “protection,” “free cooling,” or “heat alert” mode.
Step 11: create a morning custom notification
Every morning, Home Assistant can send a small heatwave briefing. No need for artificial intelligence here, a well-constructed message is enough.
alias: Heatwave - morning briefing
description: Send a heat summary every morning
mode: single

trigger:
  - platform: time
    at: "07:30:00"

condition:
  - condition: state
    entity_id: binary_sensor.mode_canicule
    state: "on"

action:
  - service: notify.mobile_app_votre_telephone
    data:
      title: "Heatwave Briefing"
      message: >
        Living room: {{ states('sensor.temperature_salon') }}°C.
        Bedroom: {{ states('sensor.temperature_chambre') }}°C.
        Outside: {{ states('sensor.temperature_exterieure_meteo') }}°C.
        If the outside is already warmer than the inside, close windows and shutters quickly.
We can enhance this message with the state of the windows:
message: >
  Living room: {{ states('sensor.temperature_salon') }}°C.
  Bedroom: {{ states('sensor.temperature_chambre') }}°C.
  Outside: {{ states('sensor.temperature_exterieure_meteo') }}°C.
  Living room window: {{ states('binary_sensor.fenetre_salon') }}.
  Remember to set the house to protection mode before the heat rises.
Simple, but effective. In the morning, at coffee time, the house reminds you of the right gestures.
Step 12: create a “heatwave absence mode”
When everyone leaves for work or vacation, the house needs to protect itself. This is where home automation makes perfect sense.
If no one is present and heatwave mode is active, Home Assistant can close exposed shutters, turn off unnecessary devices, check that the windows are closed, and maintain air conditioning at a reasonable setpoint only if necessary.
alias: Heatwave - absence mode
description: Protect the house from heat when no one is present
mode: single

trigger:
  - platform: state
    entity_id: group.famille
    to: "not_home"
    for: "00:10:00"

condition:
  - condition: state
    entity_id: binary_sensor.mode_canicule
    state: "on"

action:
  - service: cover.close_cover
    target:
      entity_id:
        - cover.volet_salon_sud
        - cover.volet_chambre_ouest
        - cover.volet_cuisine_sud

  - service: switch.turn_off
    target:
      entity_id:
        - switch.prise_ventilateur_salon
        - switch.prise_ventilateur_chambre

  - service: notify.mobile_app_votre_telephone
    data:
      title: "House protected"
      message: "Heatwave absence mode activated: shutters closed and unnecessary devices turned off."
For group.famille to work, create a group with the people in the household. In Home Assistant, this can be done via the interface or in YAML. The people are usually named person.prenom.
Step 13: avoid common mistakes
The first mistake is to open windows as soon as it feels “a little less hot.” During a heatwave, you must compare with the inside, not with your feeling. If the house is at 26°C and the outside at 31°C, opening is a bad idea, even if a little breeze seems pleasant at the moment.
The second mistake is to close all the shutters all day without distinction. It’s thermally effective but not always livable. It’s better to reason façade by façade, with the sun.
The third mistake is to automate an air conditioning system without checking the windows. Air conditioning running with a window open is literally throwing money out the window. An opening sensor for €10 can prevent hours of unnecessary operation.
The fourth mistake is placing the outdoor sensor in the wrong spot. In full sun, it may sometimes display 50°C or more. Interesting for measuring the exposure of a façade, but not for comparing with indoor temperature. For free cooling, an outdoor temperature in the shade is needed.
Finally, be cautious of overly aggressive automations. A shutter that closes every ten minutes because a threshold oscillates, a notification that comes back repeatedly, an air conditioning unit that turns on and off constantly… Nothing like that to ruin your experience with home automation. Use margins, delays, and clear conditions.
The simple method for a busy beginner
If you are new to Home Assistant and want something efficient quickly, here’s the most reasonable method.
Start by installing a temperature sensor in the living room and another in the hottest bedroom. Add an outdoor temperature via the weather integration. Then create two notifications: one to open the windows in the evening when the outside becomes cooler and another to close them in the morning when the outside becomes warmer again. Just with that, you will already gain in comfort.
Next, if you have connected roller shutters, add automatic closure based on solar orientation. This is often the most cost-effective scenario for comfort since it prevents heat from entering.
Finally, if you have air conditioning or fans, automate them with conditions based on presence and closed windows. You will achieve a much more pleasant home without turning your electricity bill into a bad soap opera.

Home Automation and Heatwaves: What to Remember
Home automation does not perform miracles, but it knows how to do what we do wrong when it’s too hot: react at the right moment, without forgetting, without fatigue, without approximation.
Home Assistant can monitor indoor temperatures, compare them with the outside, close shutters according to the sun, notify when to open windows, control a conventional air conditioning unit, cut off unnecessary fans, and alert when a room becomes too hot. All this with very common equipment and some well-thought-out automations.
And this is precisely where the connected house makes perfect sense… no, actually, let’s be honest: it’s not about gadgets or a “wow” technological effect. It’s very concrete comfort in daily life. When the house keeps 2 or 3 degrees cooler during a heatwave, it’s not a detail. It’s a slightly more breathable night, a child who sleeps better, an air conditioning system that runs less, and a bill that is a bit more reasonable.
Unfortunately, heatwaves are becoming an increasingly frequent appointment. It’s best to prepare the house before the mercury rises again. Your future self, sweating in front of the thermometer, will thank you.

Please remain courteous: a hello and a thank you cost nothing! We're here to exchange ideas in a constructive way. Trolls will be deleted.