Following my presentation of the Swiss Backup service from Infomaniak, several of you asked me how I back up my Synology NAS with this service. It is not very difficult to set up, but it is true that you need to know the few steps. Here is a complete guide for backing up a Synology NAS to Swiss Backup.
Why choose Swiss Backup for backing up a Synology NAS?
I have been using the official Synology C2 service for several years, which allows you to back up your Synology NAS to secure servers in Europe. This provides a decentralized backup in case of major issues (destruction of the NAS, fire, etc.). I back up the essentials, as my NAS currently has 23TB of storage, which is no small feat to save. Backing up family documents, photos, and some important data, such as the database of my sites, etc., is crucial.
Despite this rather selective choice, my backup currently exceeds one terabyte of data. However, Synology’s C2 solution is originally limited to 1TB :/ At €5.99 per month, it was so far a perfect and economical solution.
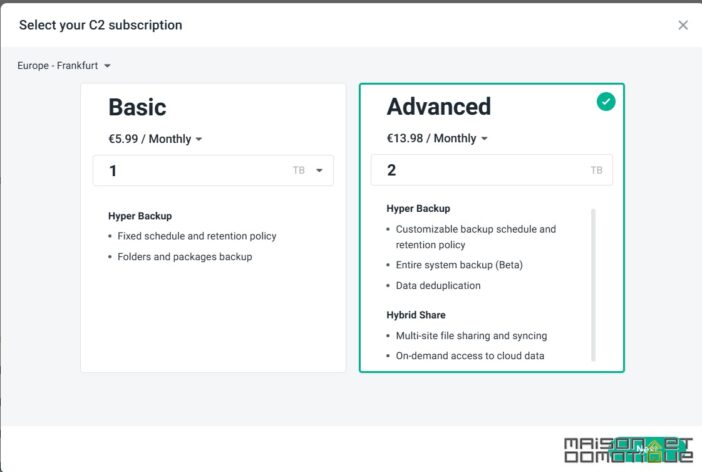
If we wish to increase the capacity, we need to opt for the “Advanced” subscription, which allows for selecting larger capacities. But of course, this comes at a higher cost. Thus, moving to 2TB costs just under €14. And 5TB goes up to just under €35. Which starts to add up every month.
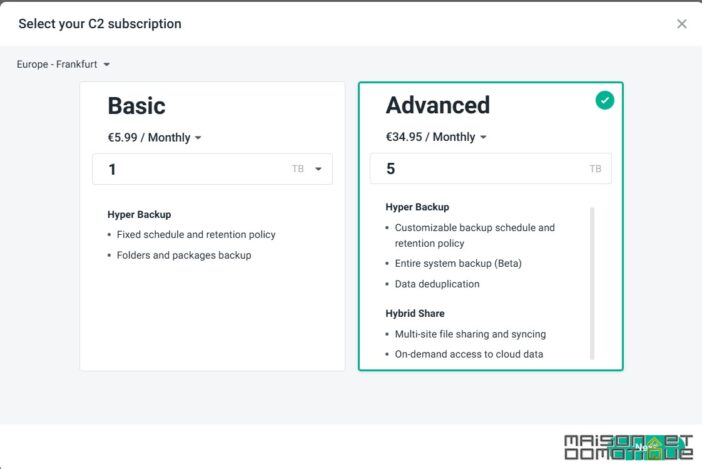
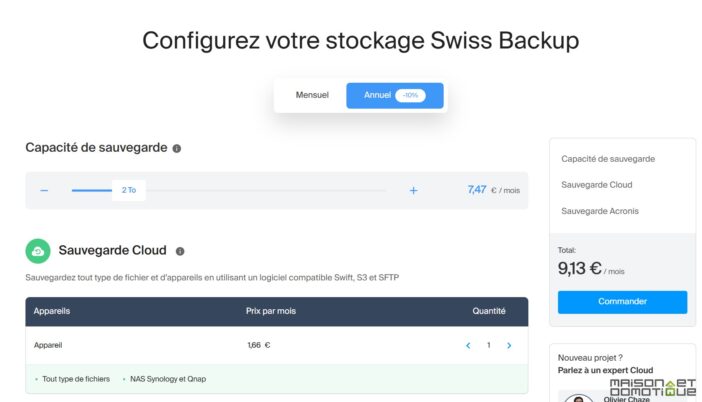
In this regard, the Swiss Backup solution offers more advantageous rates while providing the same range of services. For example, 2TB costs €9.13 compared to €13.98 at Synology:
It’s even more striking for 5TB, as we have €20.34 at Infomaniak versus €34.95. And so on if you need more space.
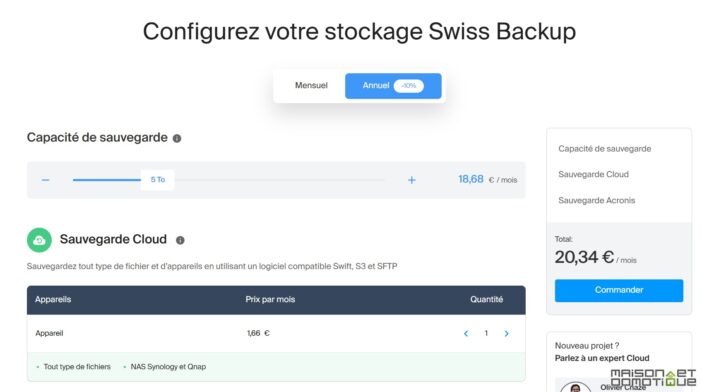
As mentioned in the article on the presentation of Swiss Backup, the servers are in Switzerland and benefit from all the security assurances one can expect. The services are quite comparable to Synology, so the main argument for this change is essentially the more advantageous pricing.
But in practice, how do you back up your Synology NAS with Swiss Backup?
Backing up your Synology NAS with Swiss Backup: the steps
You will of course need to start by subscribing to a Swiss Backup subscription from Infomaniak.
Currently, upon subscribing, the service does not seem to allow selecting more than 1TB initially. But don’t worry, this can be changed with two clicks afterwards.
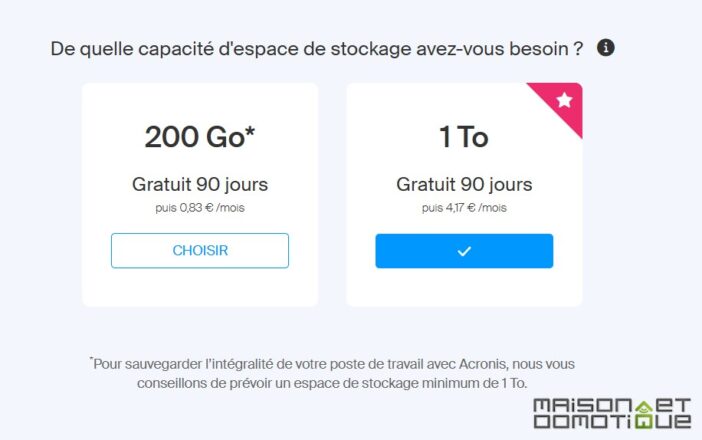
Configuring Swiss Backup Space
Once the service is subscribed, you can access your management interface. It is quite empty for now:
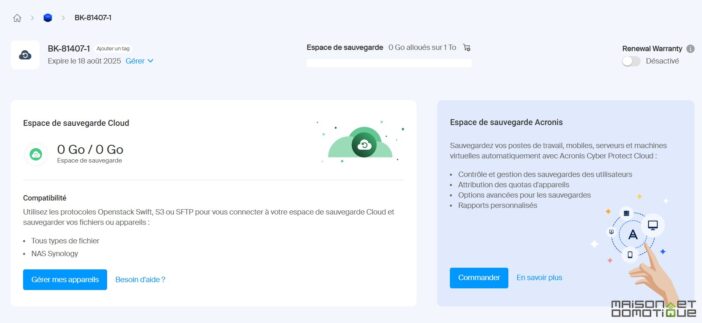
Click on “Manage Devices.”
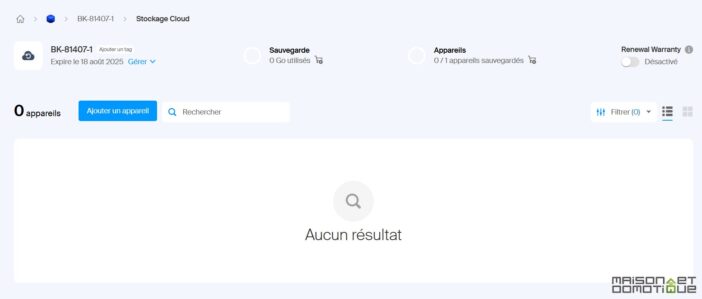
Of course, no devices are available yet. You need to click on “Add a Device.” Here, select “NAS Synology”:
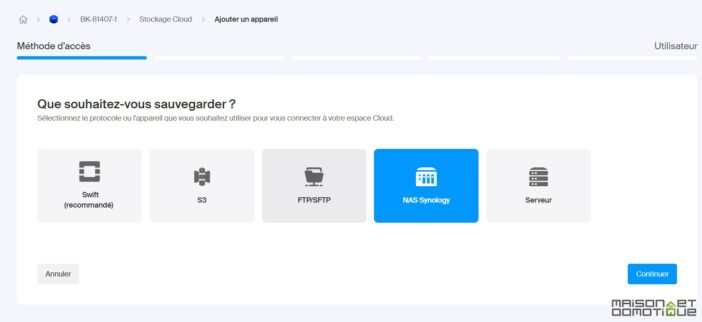
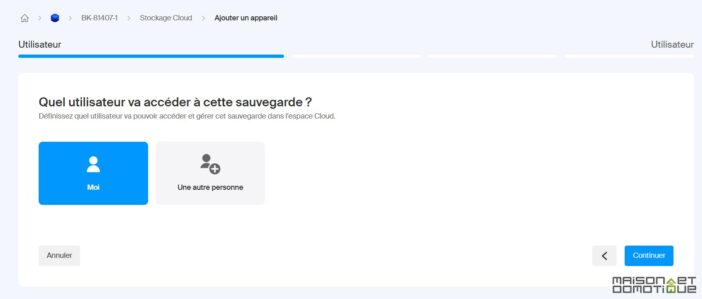
Select your user:
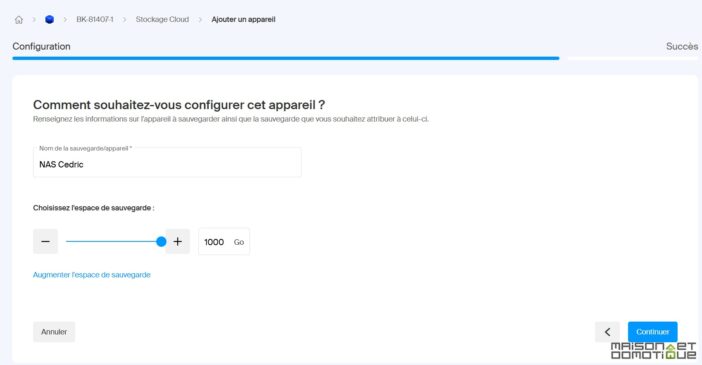
And indicate the storage space to be used. For now, I set the maximum, which is 1TB.
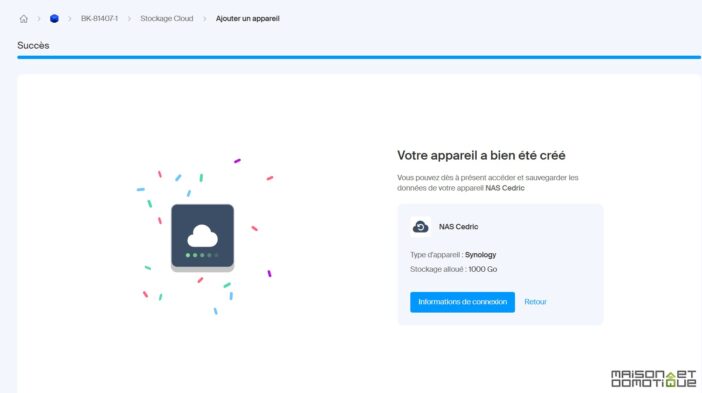
And here is our device created:
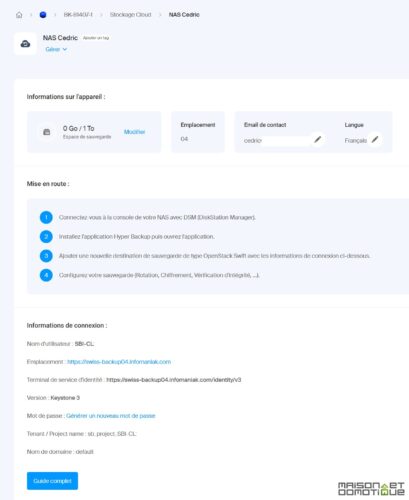
Via the “Connection Information” button, you can obtain all the necessary information for configuring the backup on Synology.
Configuring the Synology Backup
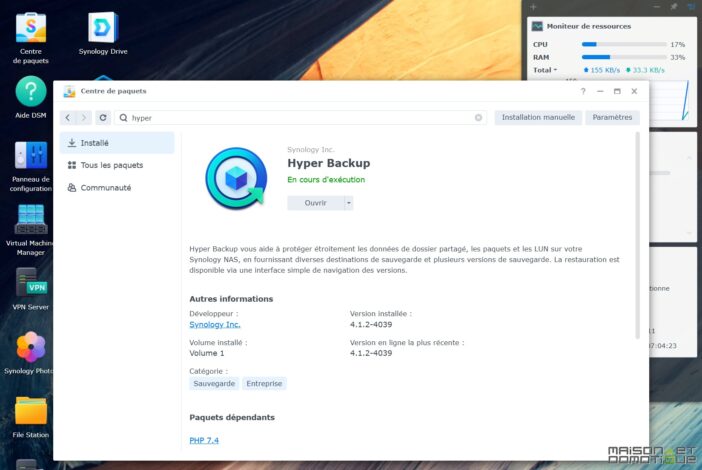
Now let’s go to the Synology interface. If you don’t have it yet, you will need to install the “Hyper Backup” package via the Package Center.
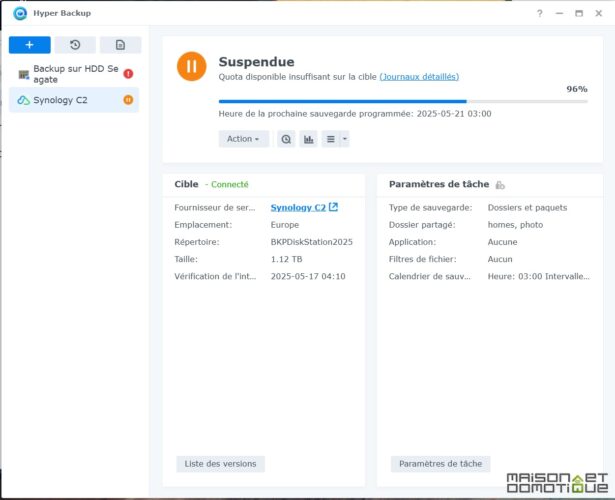
I already have ongoing tasks here, as I had a C2 backup and an occasional backup on an external hard drive.
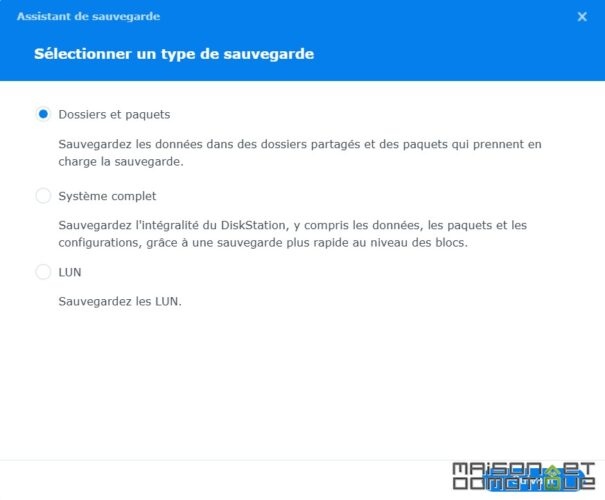
We are adding a new backup task of type “Folders and Packages,” which will allow us to select precisely the information we wish to back up.
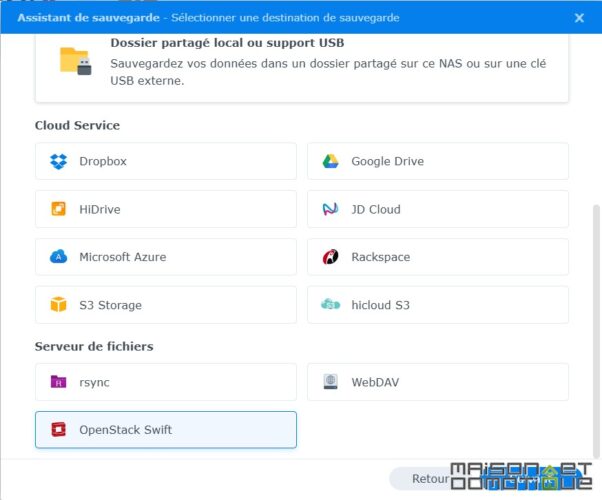
Next, select the file server of type “OpenStack Swift”:
And enter the information provided by the Swiss Transfer page seen above, in this manner:
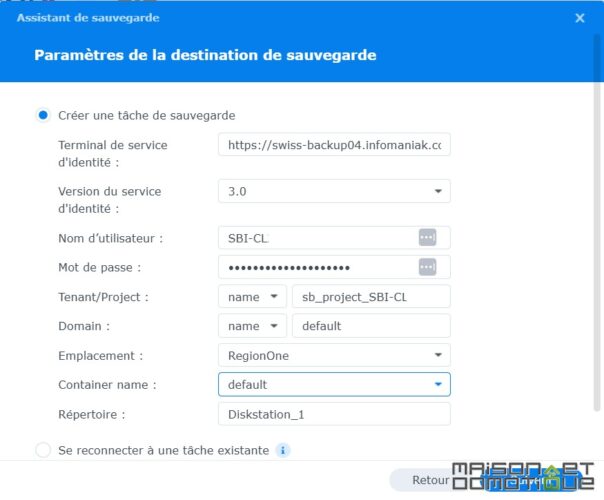
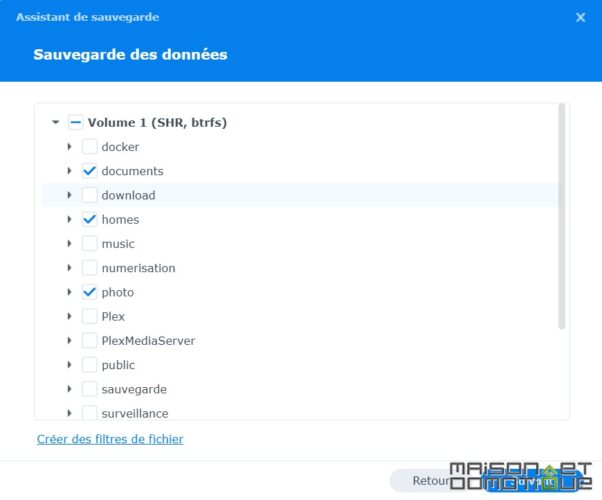
Next, select the folders you wish to back up. Here, the “homes” folder allows you to save documents for each user of the Synology NAS. I also back up the photo and documents folder, which are shared folders for everyone.
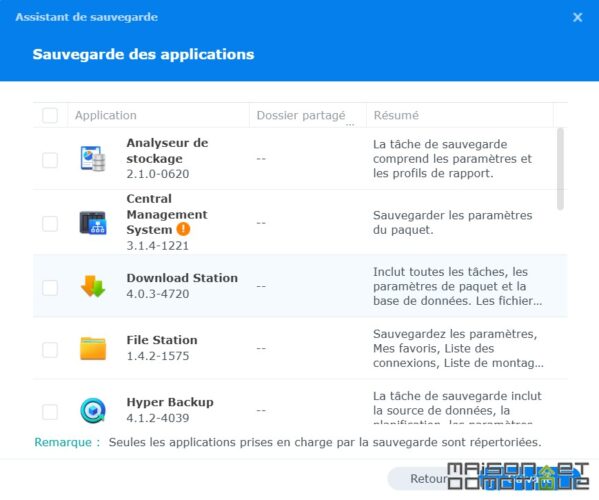
You can also select Synology applications to back up if you wish:
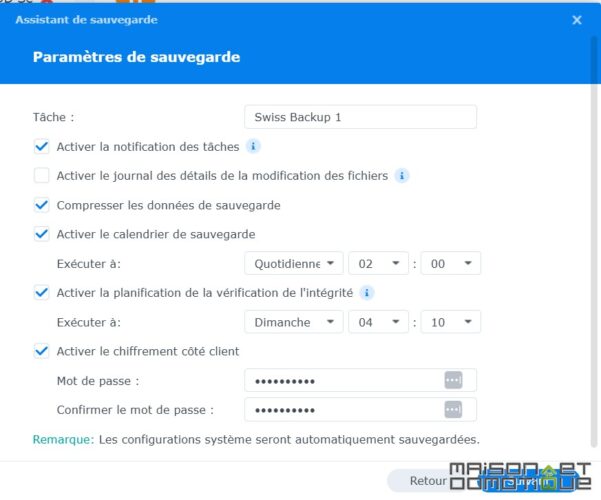
Finally, schedule the days and times for the backups. Here, I perform a backup every day at 2 AM, a time when the server is usually the least used. A data integrity check is also performed once a week, on Sunday at 4 AM.
All that’s left is to set the rotations, that is, the number of versions that the system will keep in backup. For example, if you want to find the version of a document before its modification from a month ago, backing up several versions will allow you to go back in time through previous versions. The “Smart Recycle” function works quite well to do this automatically.
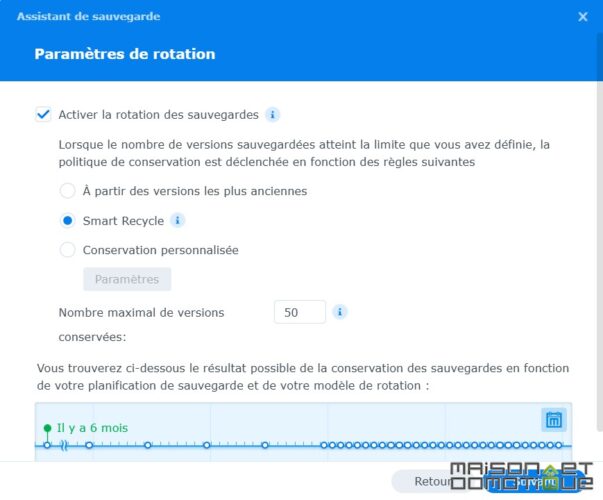
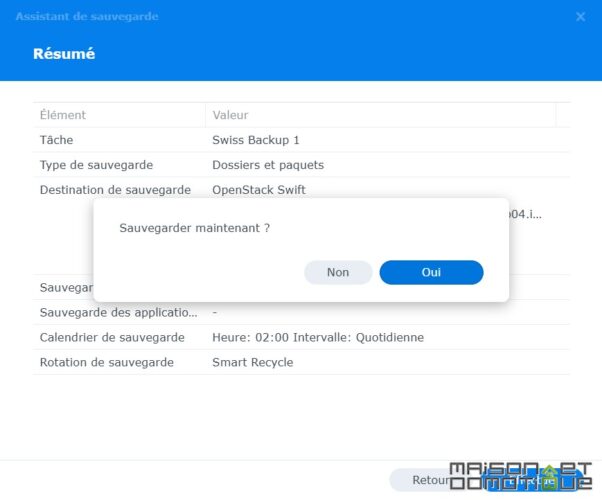
We validate all this, and our backup task is ready! We can initiate a full backup right now if we wish.
For my part, since 1TB is not enough, I first had to go to the Swiss Backup account management, and modify the offer to select 2TB. We are free to choose the necessary space, up to 10TB:

The modification takes only a few seconds. And from there, my Synology backup can finally take place on Swiss Backup:
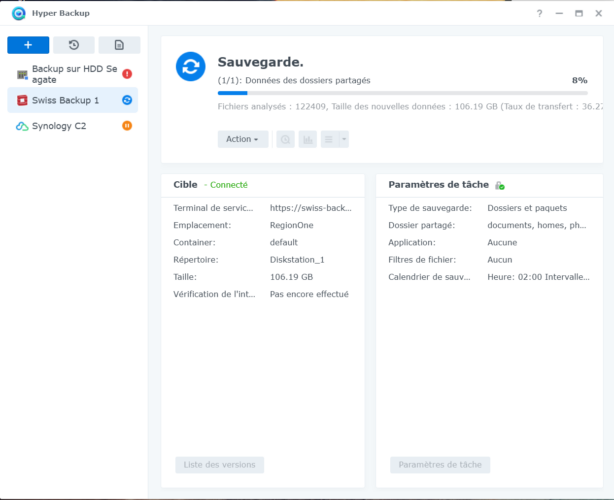
Depending on the number of files and your internet connection, the first backup may take several hours. Subsequent backups will go much faster since only modified files will be saved. Hyper Backup handles this very well to optimize the backup!
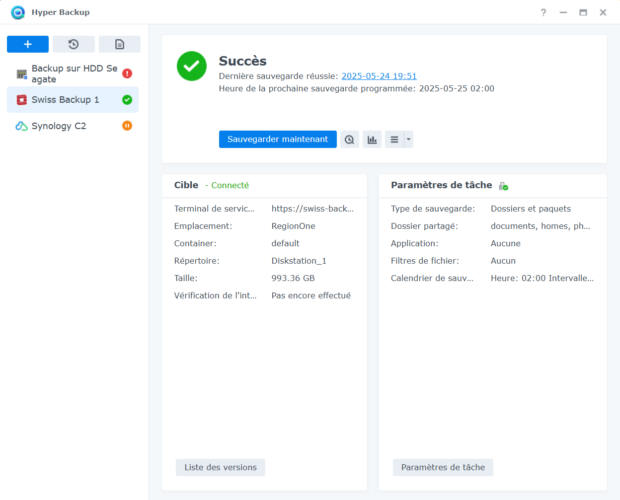
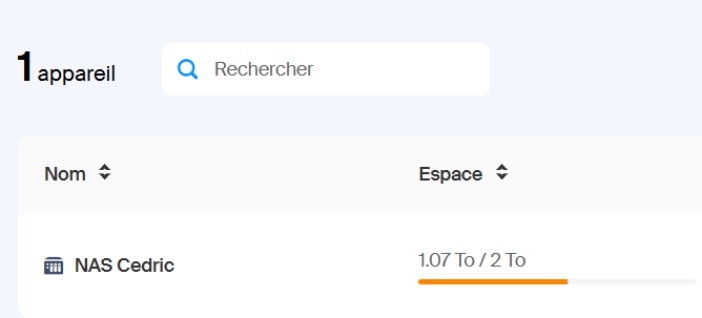
And here is my backup successfully completed, taking up 1.07TB! I can relax for a while until 2TB :) I can then upgrade to 5TB when necessary.
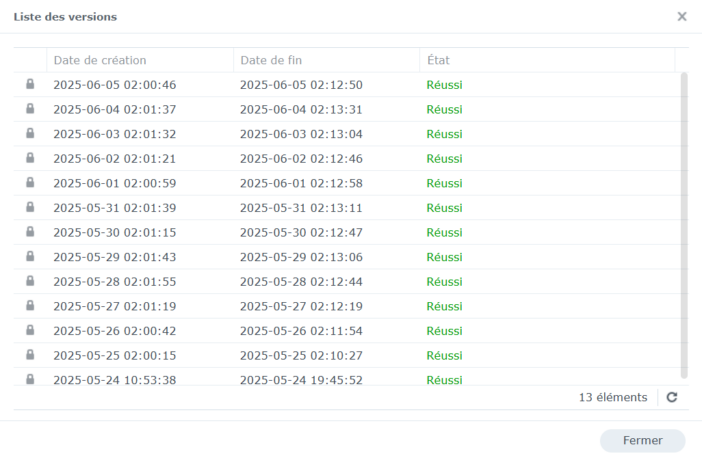
You can find all backups made on the Synology NAS if you wish to verify.
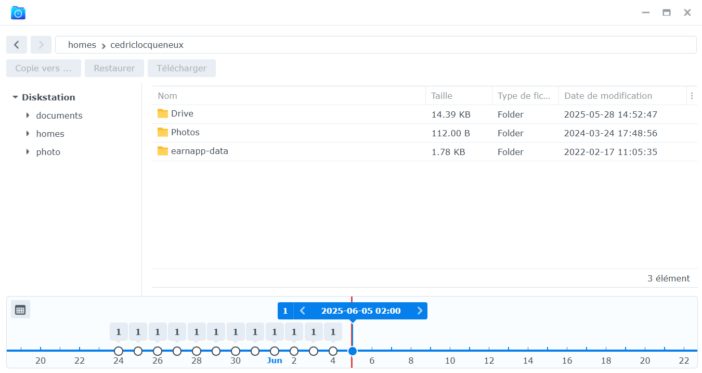
Via the “Backup Explorer” button of Hyper Backup, you can navigate between versions and retrieve your files if needed. With one click, you can download or restore the version you want. Easy!
Conclusion
As we have seen, setting up the backup of the Synology NAS to Swiss Backup is not complicated. A few steps to follow to schedule the backup task, and then the system works on its own. Remember to activate Synology notifications, by email or otherwise, to be alerted if a backup fails, so you don’t have unpleasant surprises on the day you need to restore a file, or even the entire NAS. And let it run quietly!
If you wish to take advantage of this service, I remind you that the exclusive promo code SB20-VGT offers 20% off for 12 months, for up to 10TB of storage with Acronis included, for a maximum of 3 devices (Windows, macOS, Microsoft 365, VMware, etc.). Note that it cannot be combined with the free 90-day trial: you must subscribe directly to benefit from it! A discount always worth taking!


Please remain courteous: a hello and a thank you cost nothing! We're here to exchange ideas in a constructive way. Trolls will be deleted.